Here we are, part 3 in the tie series and this one happens to be my personal favorite: the bow tie! (If you missed the first 2 tutorials, fret not; you can find the “Four-In-Hand” knot here and the “Windsor” knot here!) Bow ties are just a touch trickier to tie properly than a regular tie, so to save yourself from some unnecessary wedding day stress be sure to practice this before your wedding day! This tie requires a bit of trial and error; so don’t get frustrated if you don’t get it on your first try. I most definitely did not, but I am going to lay out the steps for you as simply as I can.
The good news is once you adjust the bow tie to your neck size, you’ll never have to do that part again – so be patient the first time you do this as it might take a little adjusting to get it to be the perfect size for you. (If you get through the steps below and it is too big or too small, you’ll need to re-adjust the length of the bow tie and try again.) (Side note, if you invest in a bow tie with a clip (as seen below), once you tie it the first time you’ll never have to tie it again!) Here we go!
How To Tie a Perfect Bow Tie

1) Start with the bow tie lying face up. Adjust the bow tie so the left side is shorter than the right (as with the other tutorials, you can flip these if you please, it makes no difference – just be sure to flip the rest of the directions too). The shorter end on the right will be referred to as A and the longer end on the left will be referred to as B.
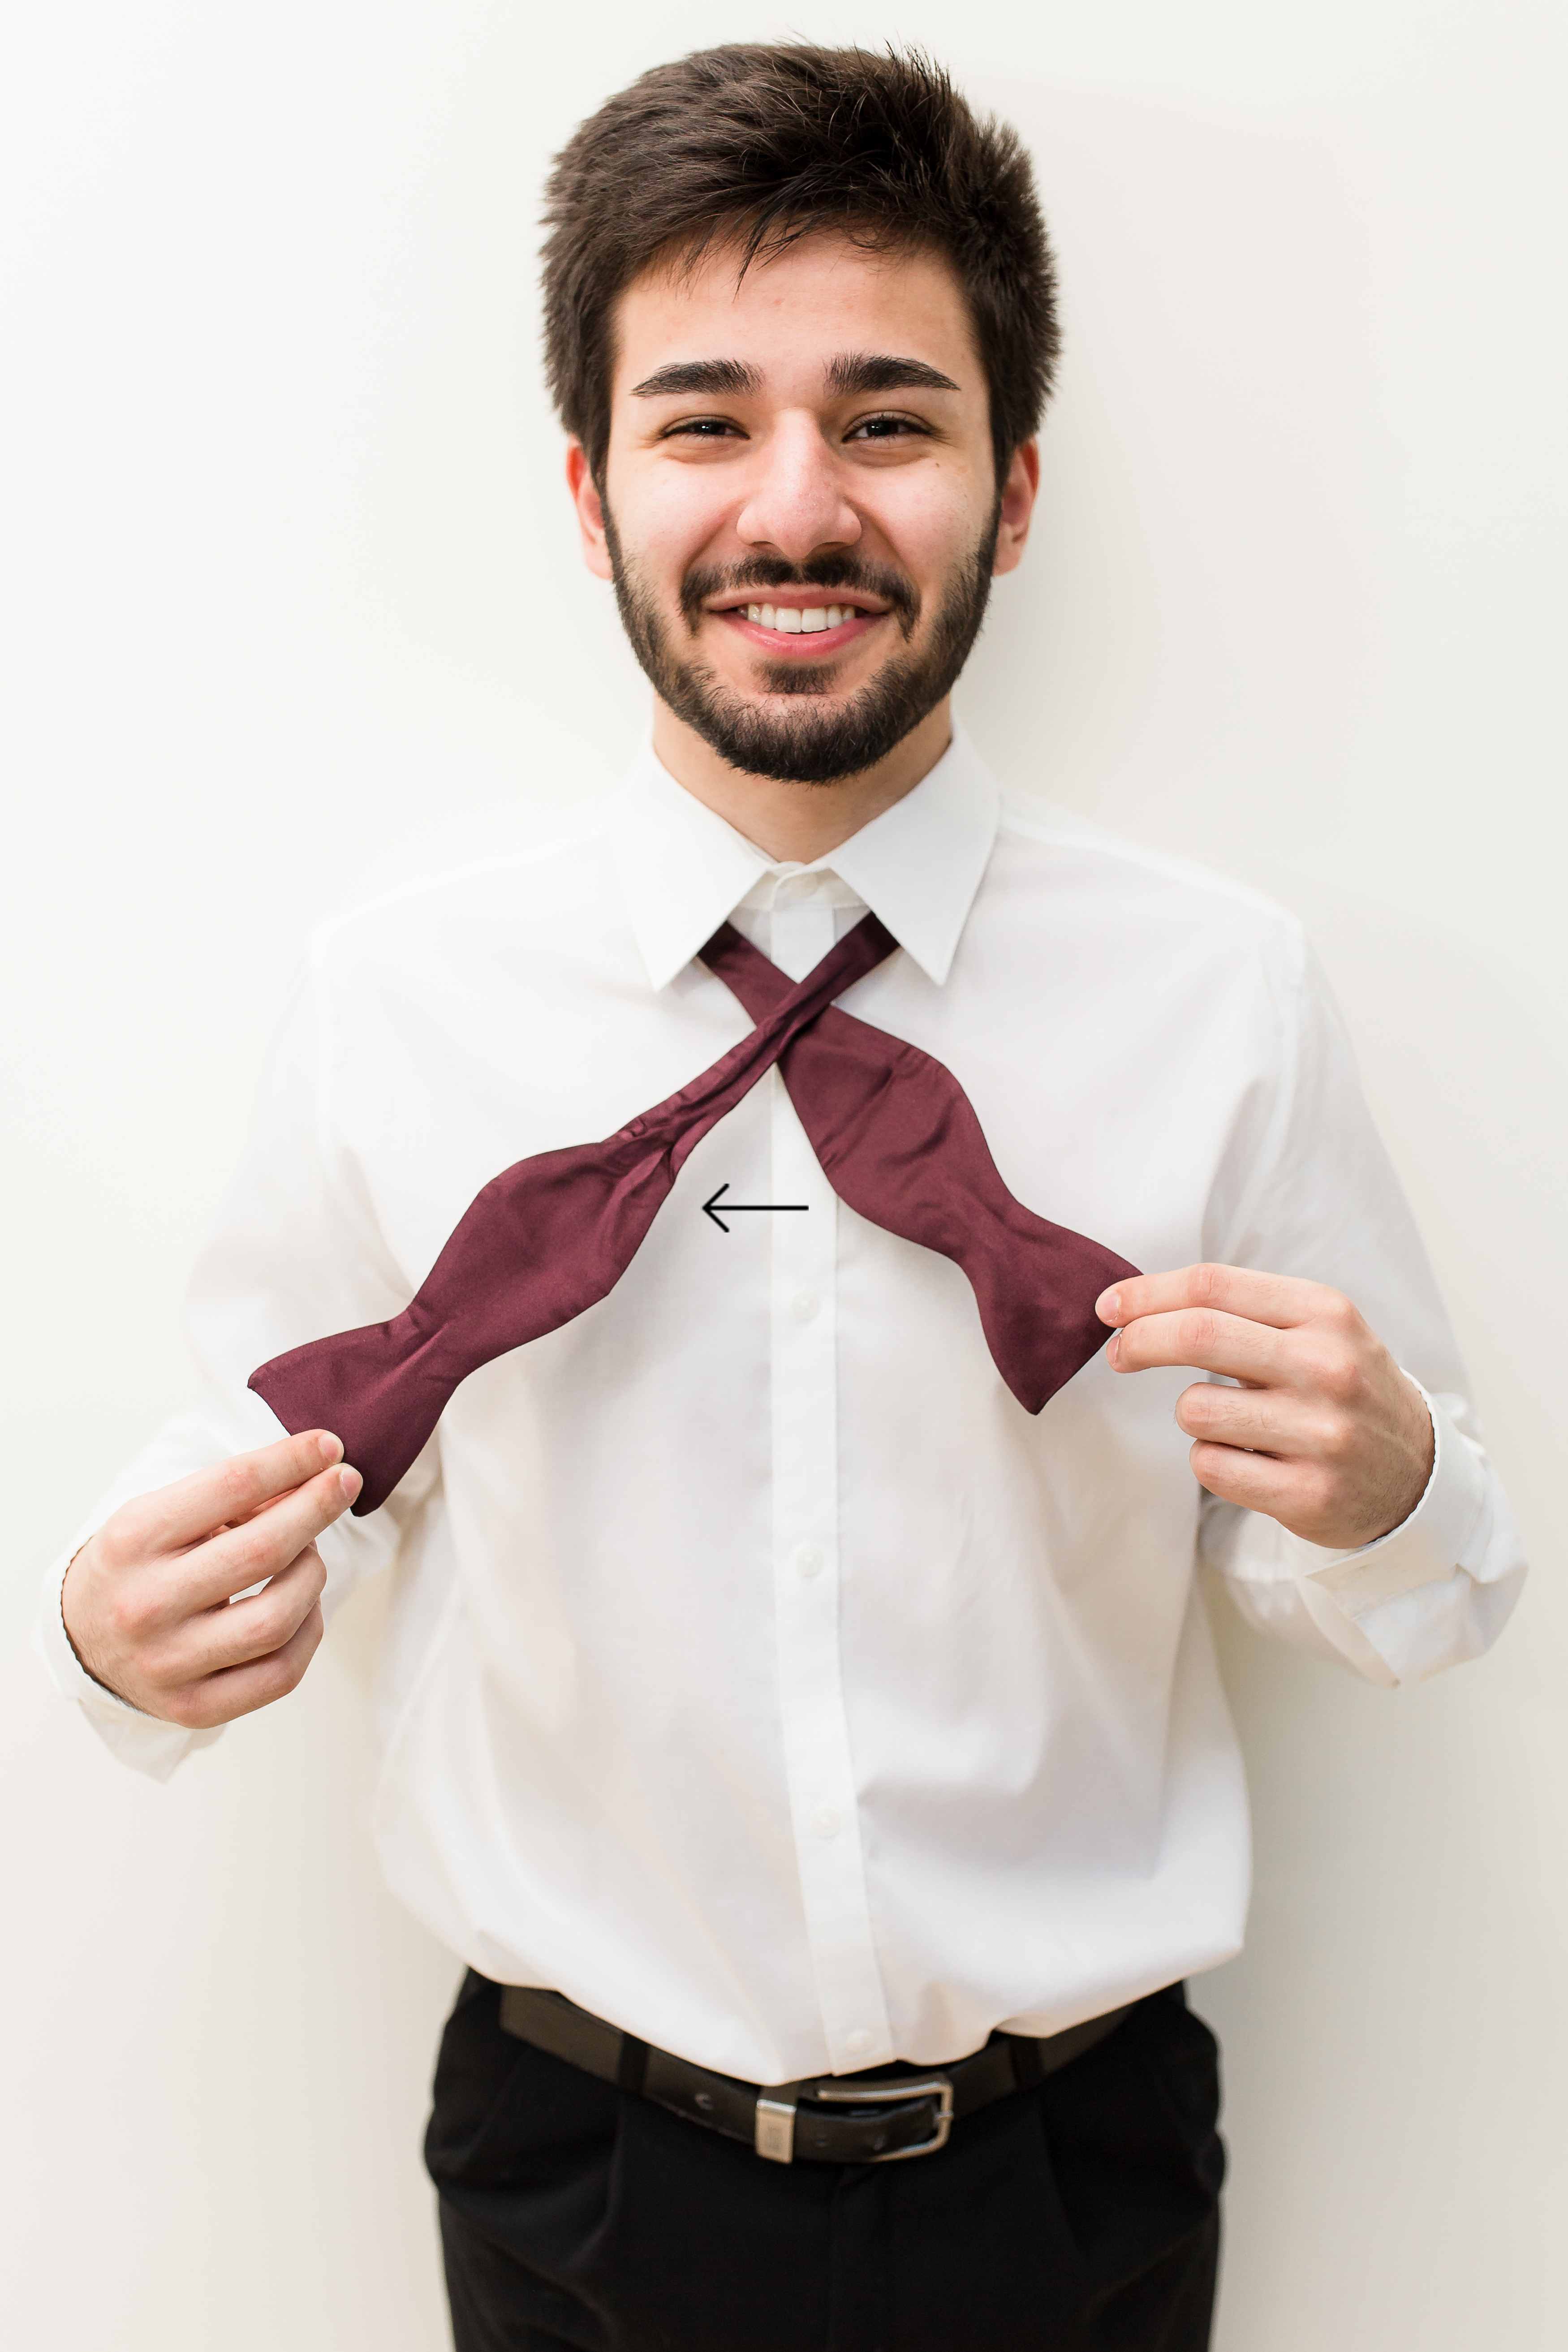
2) Crisscross the ends, B goes over A. Take note of where the two sides cross, it’s important they intersect at the base of A’s shape.

3) Bring B up through the neck loop and pull tight.
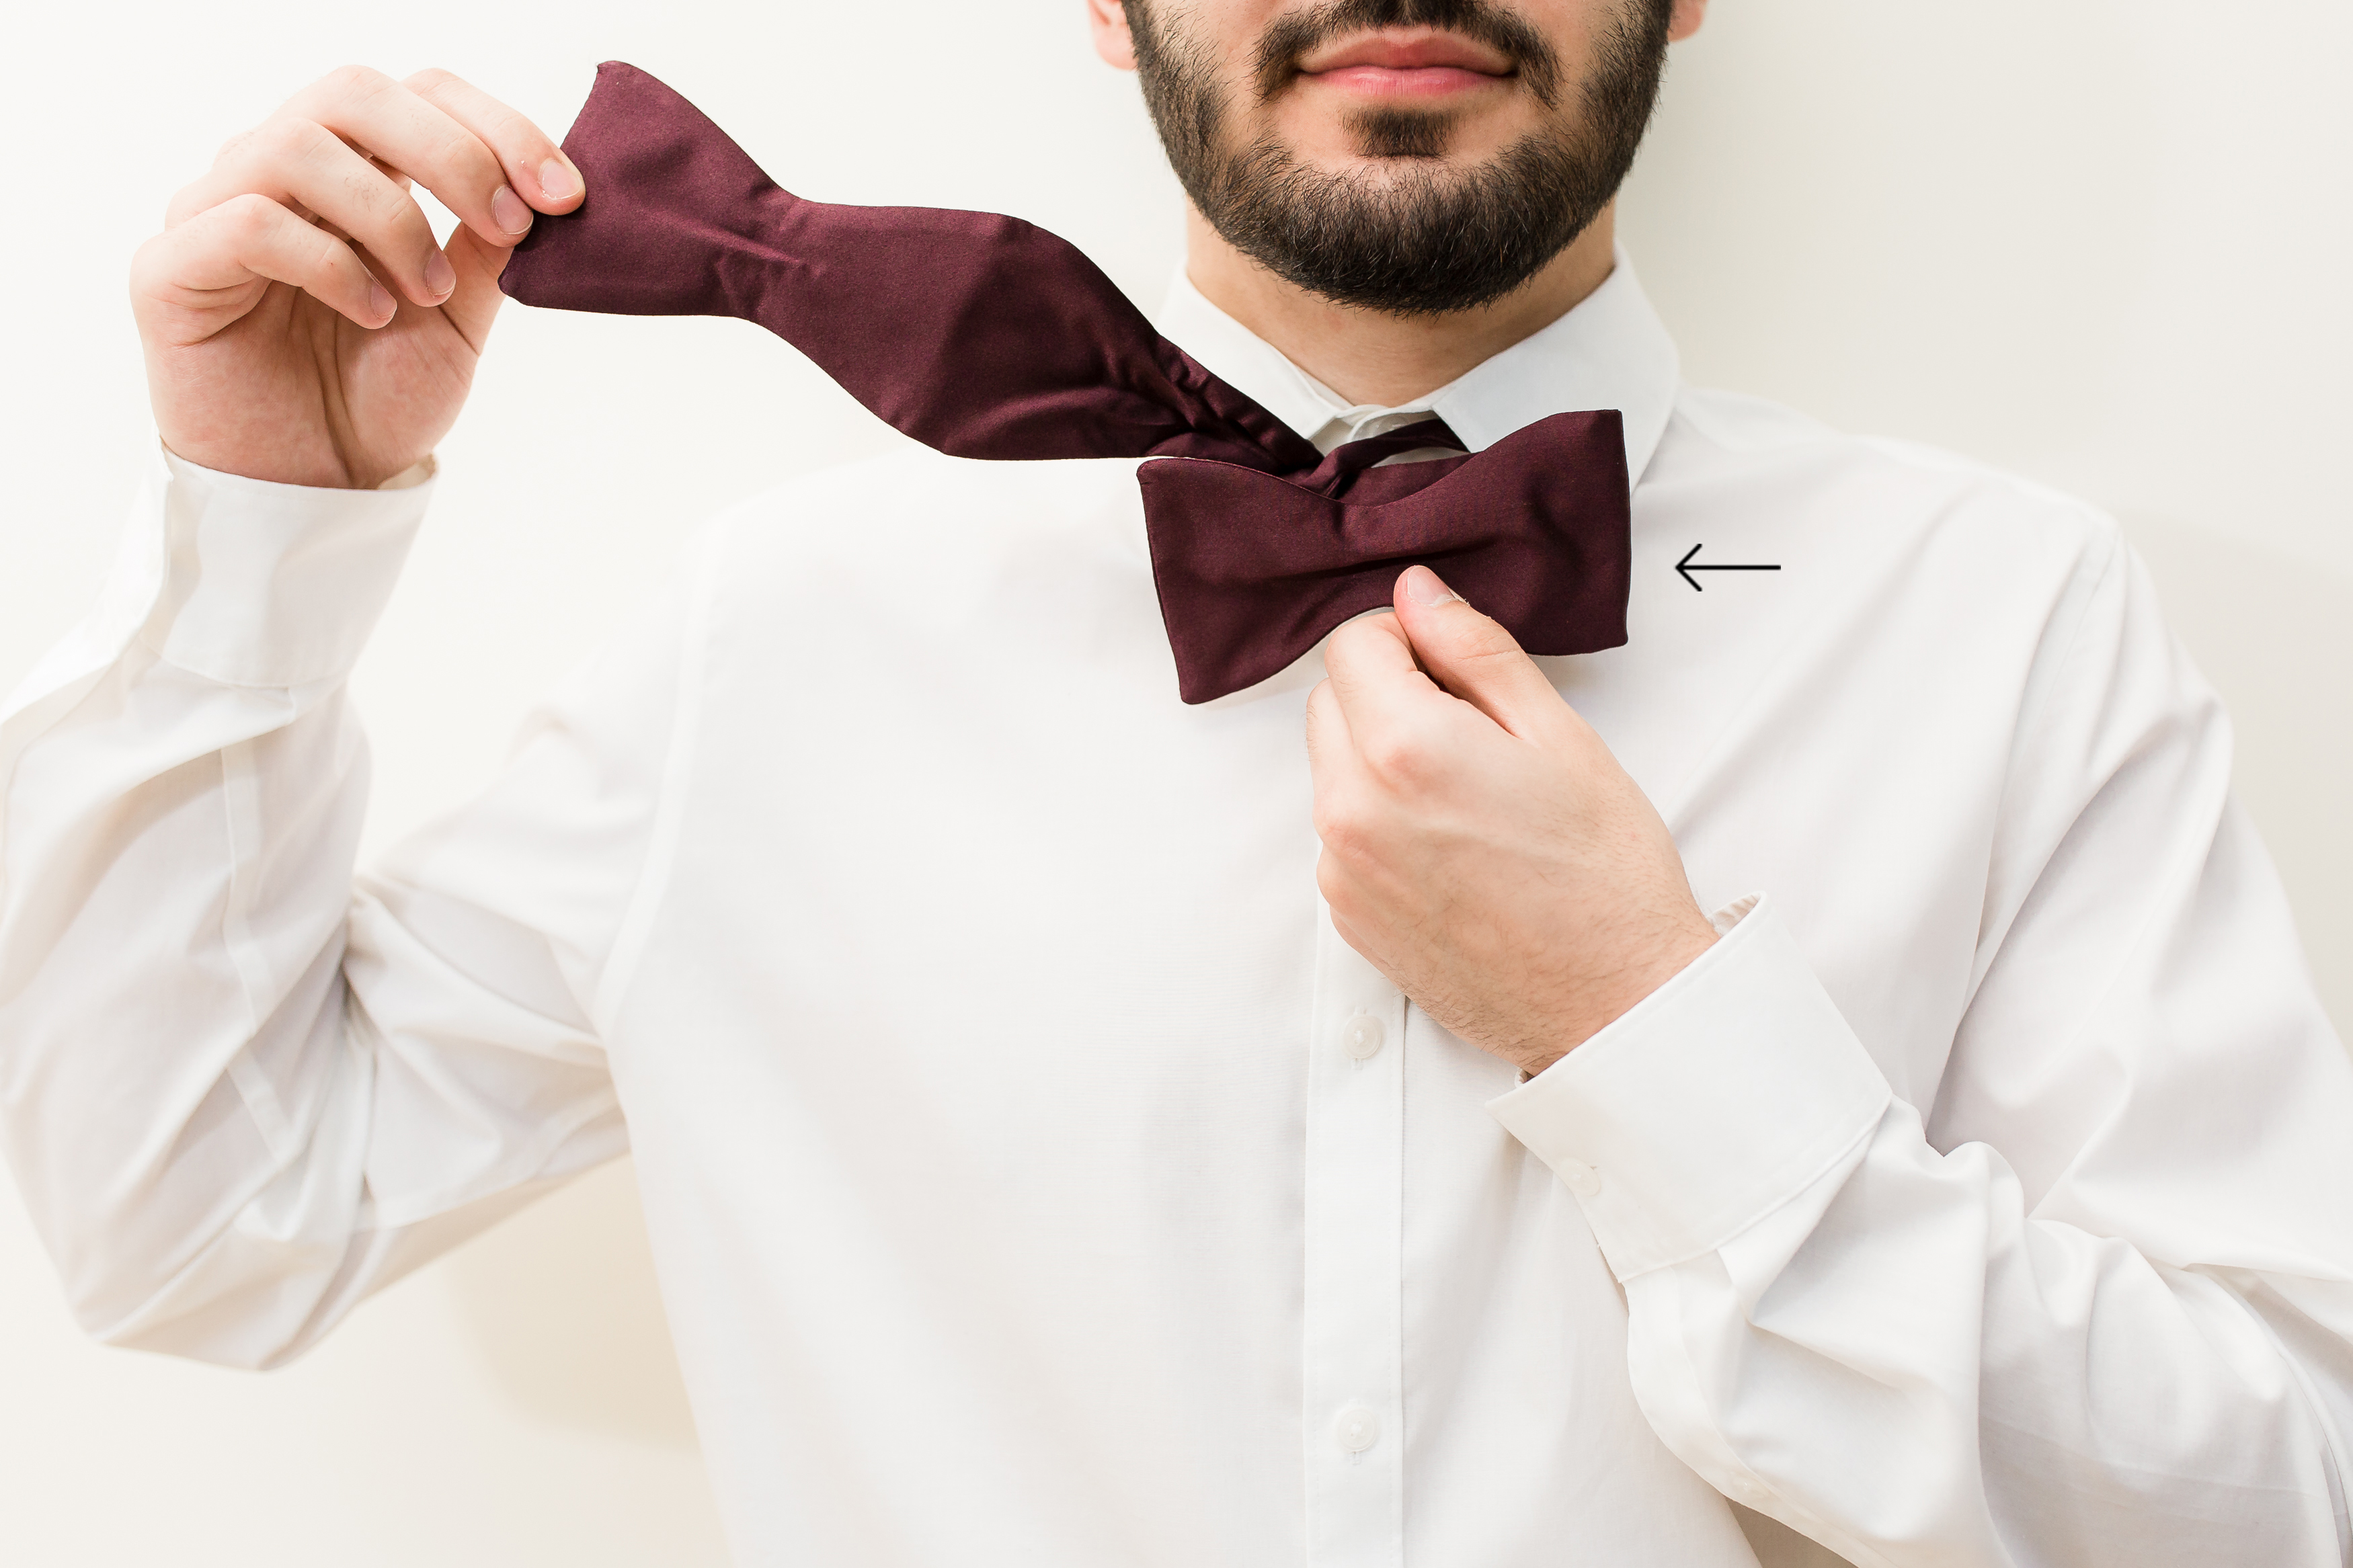
4) Fold A in half over towards the right to create the bow shape above.
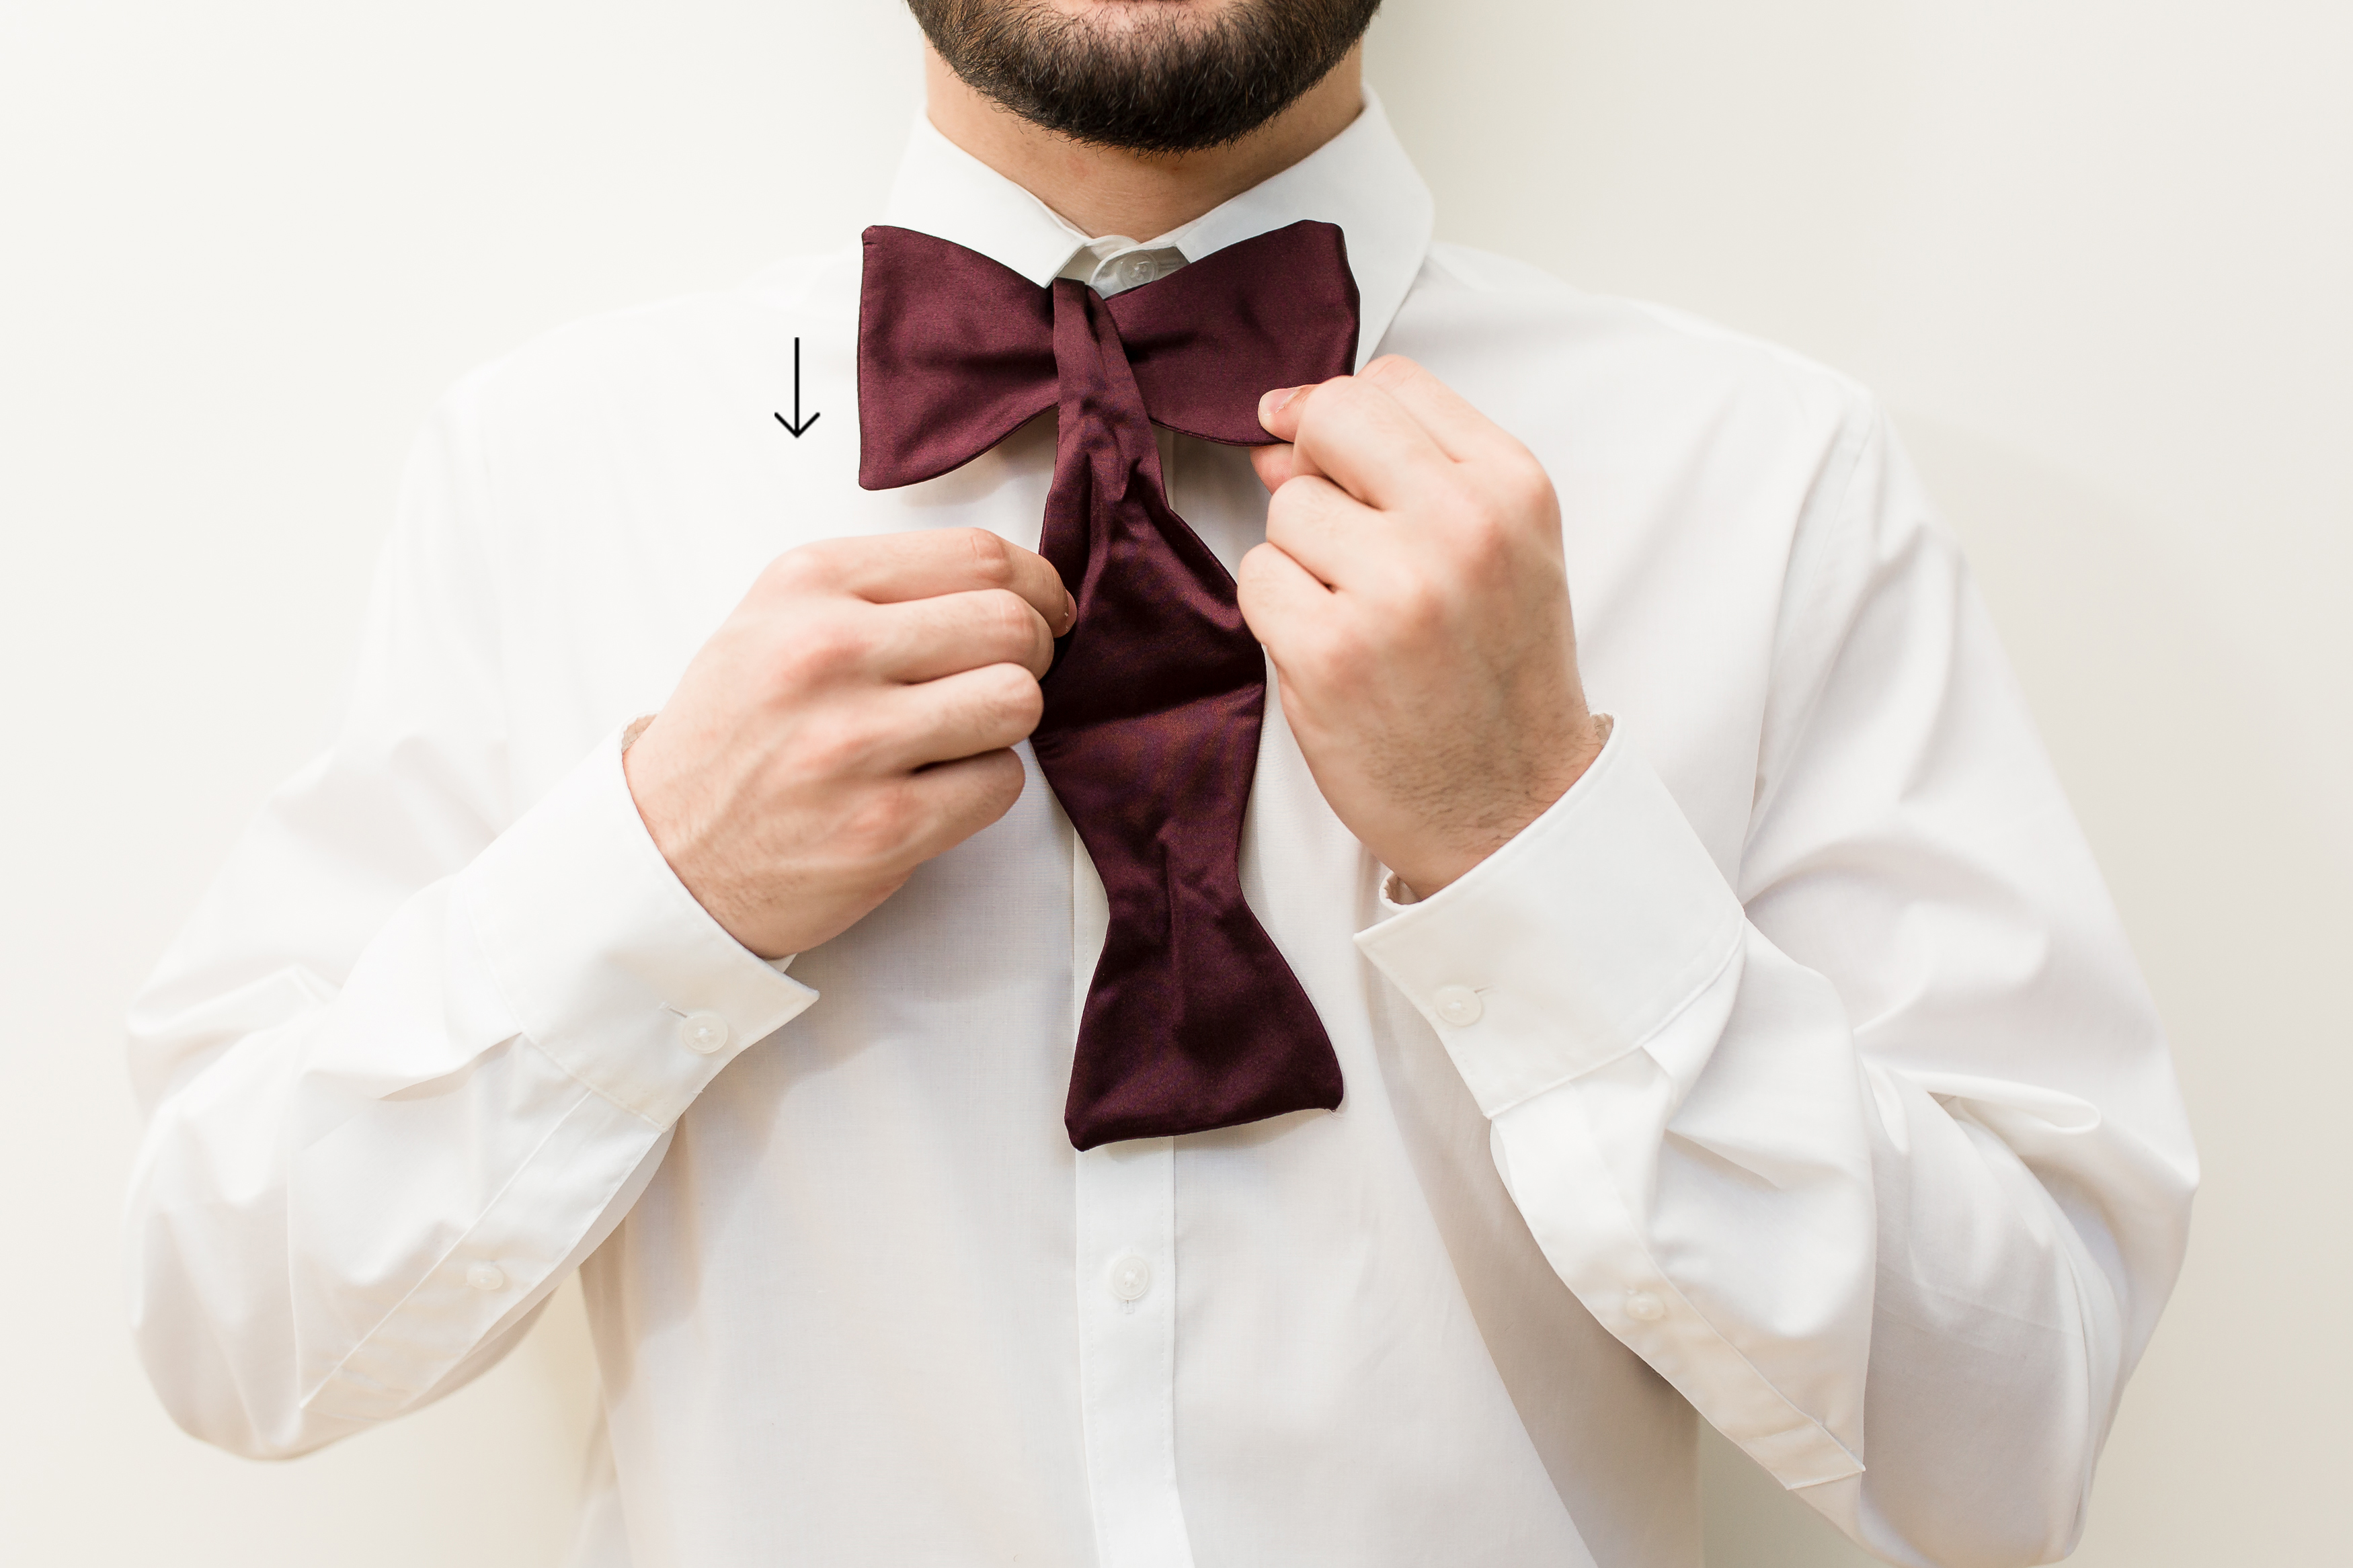
5) Bring B straight down over the middle of the bow shape that was just made. (Be sure to keep B’s strip wide as you place it down the middle – this will help your bow tie to lay flatter in the final step.)
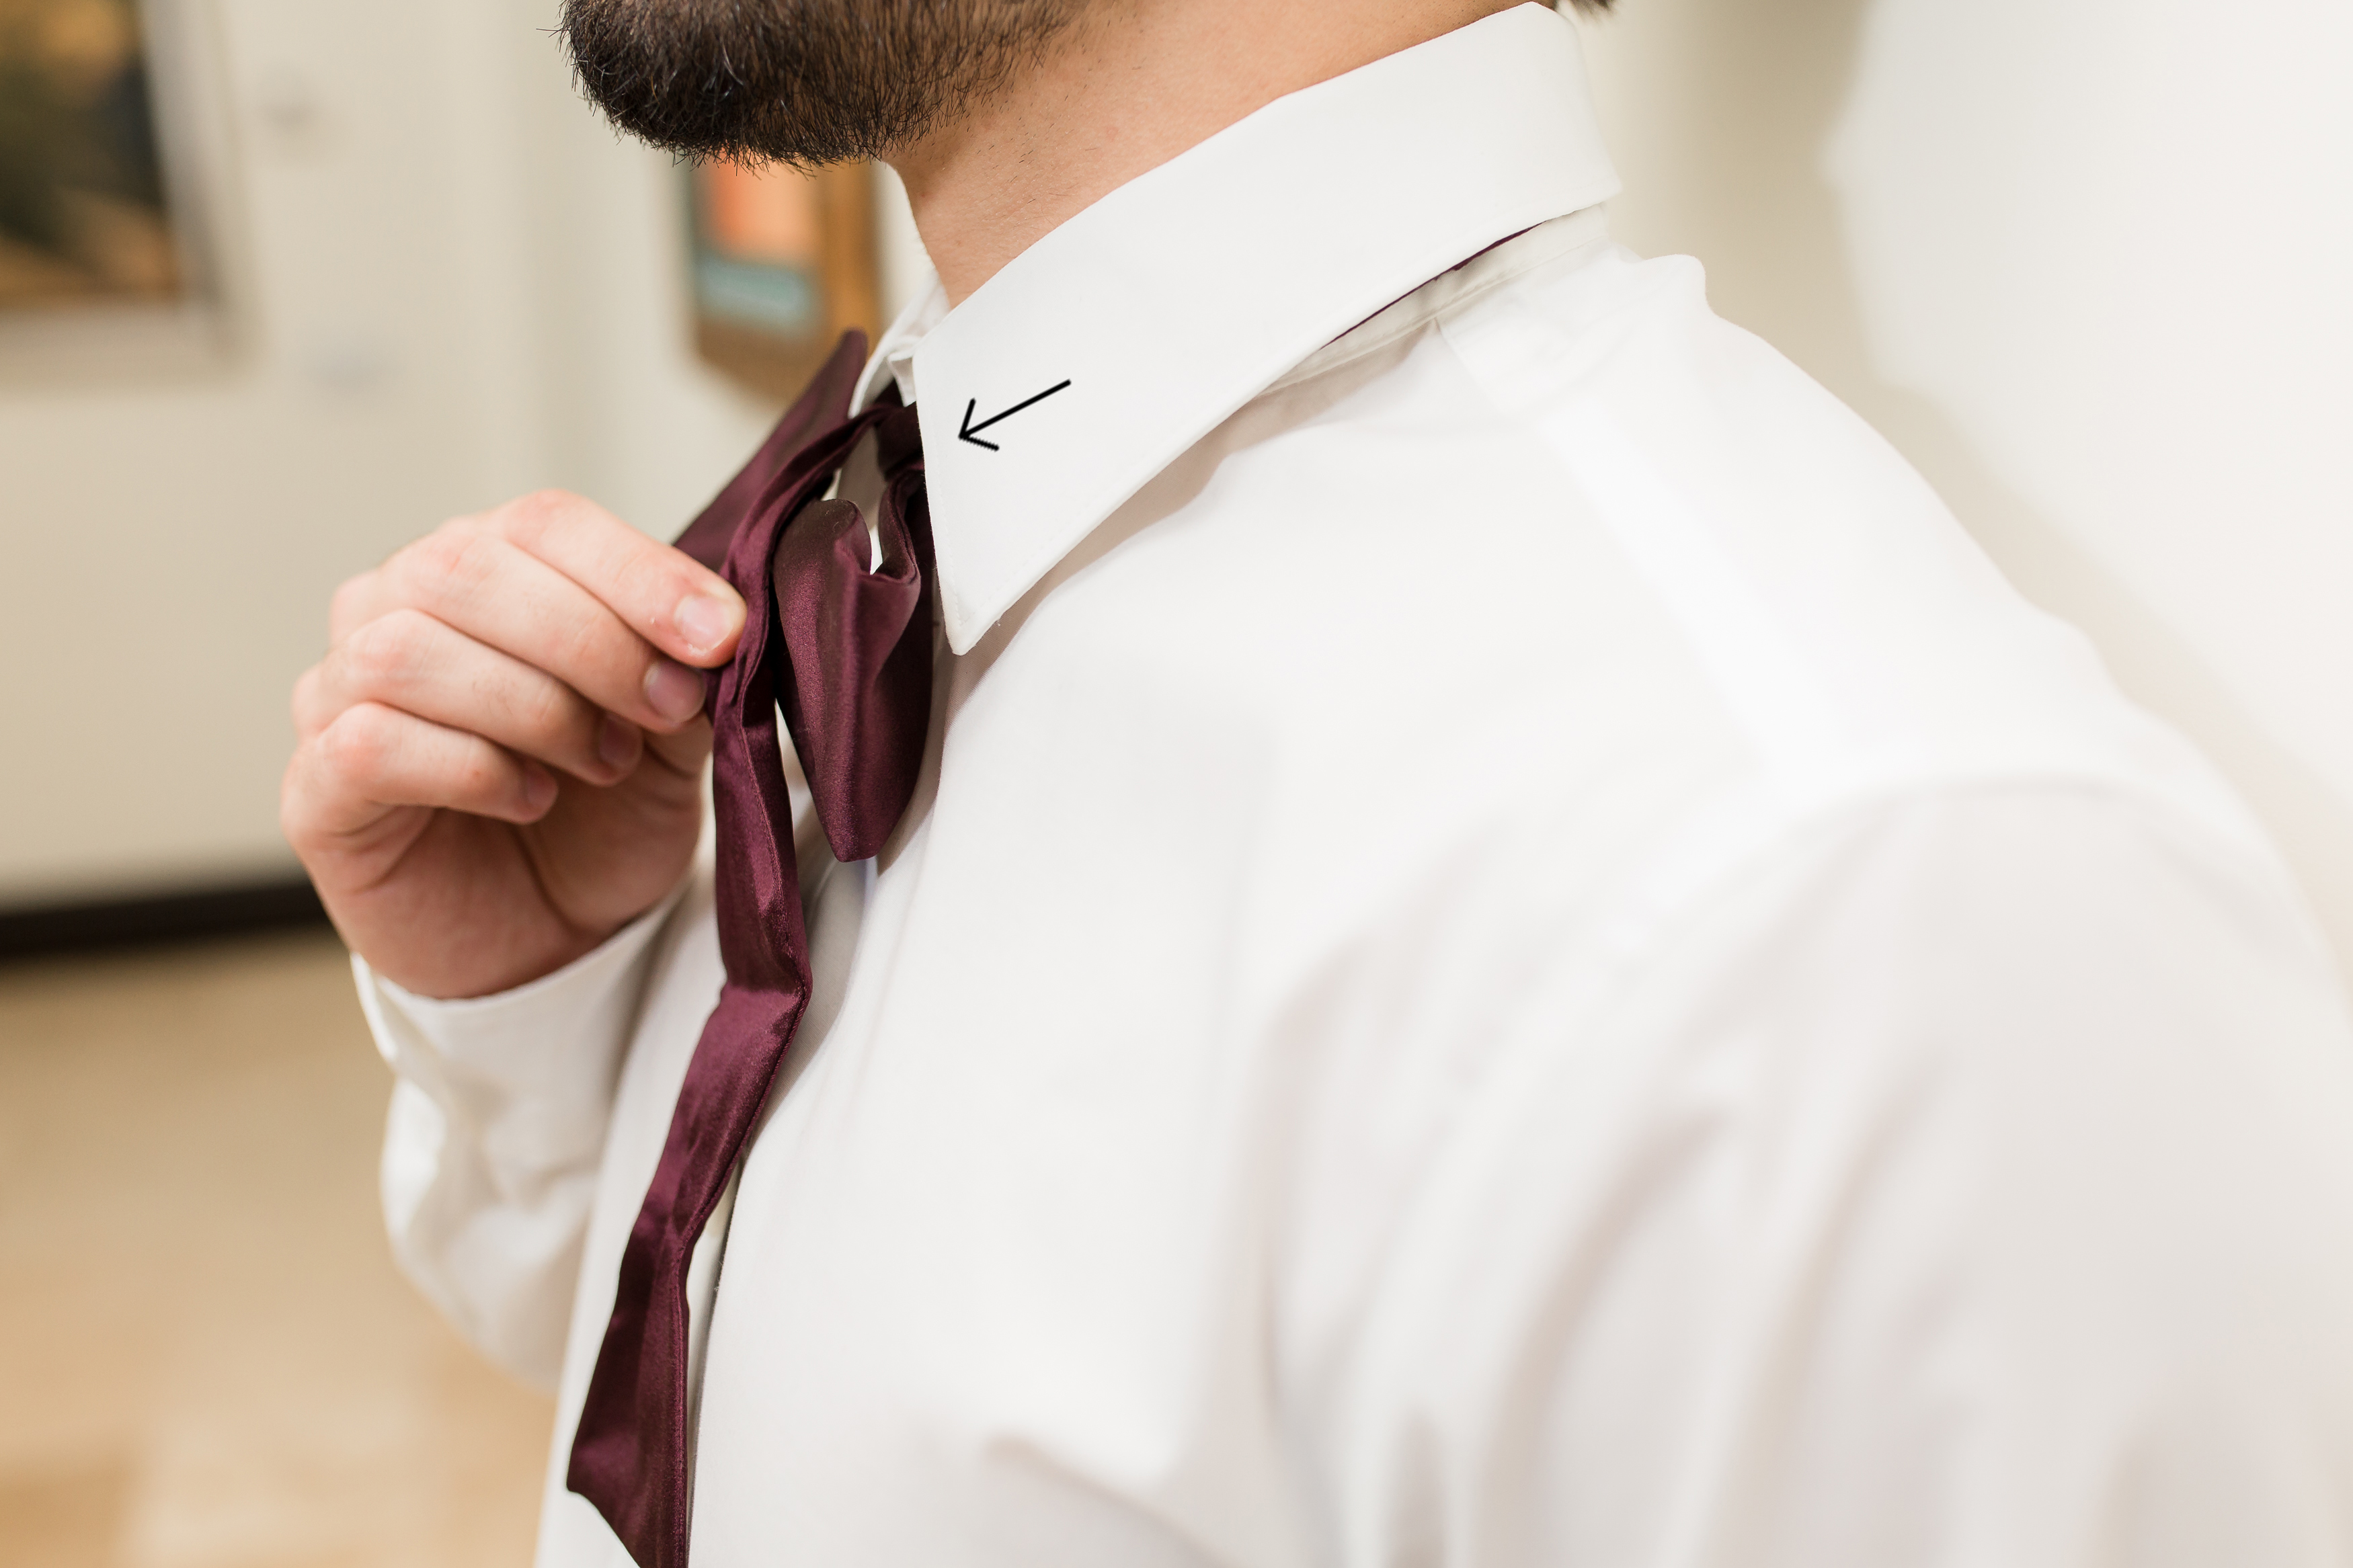
6) You will notice this creates an opening/loop behind the bow. This is the loop I will mention in step 8.

7) Bring B under the left side of the bow – adjust to keep the strip down the middle wide. With your left hand pinch the bow tie at the base of B’s shape as indicated above.
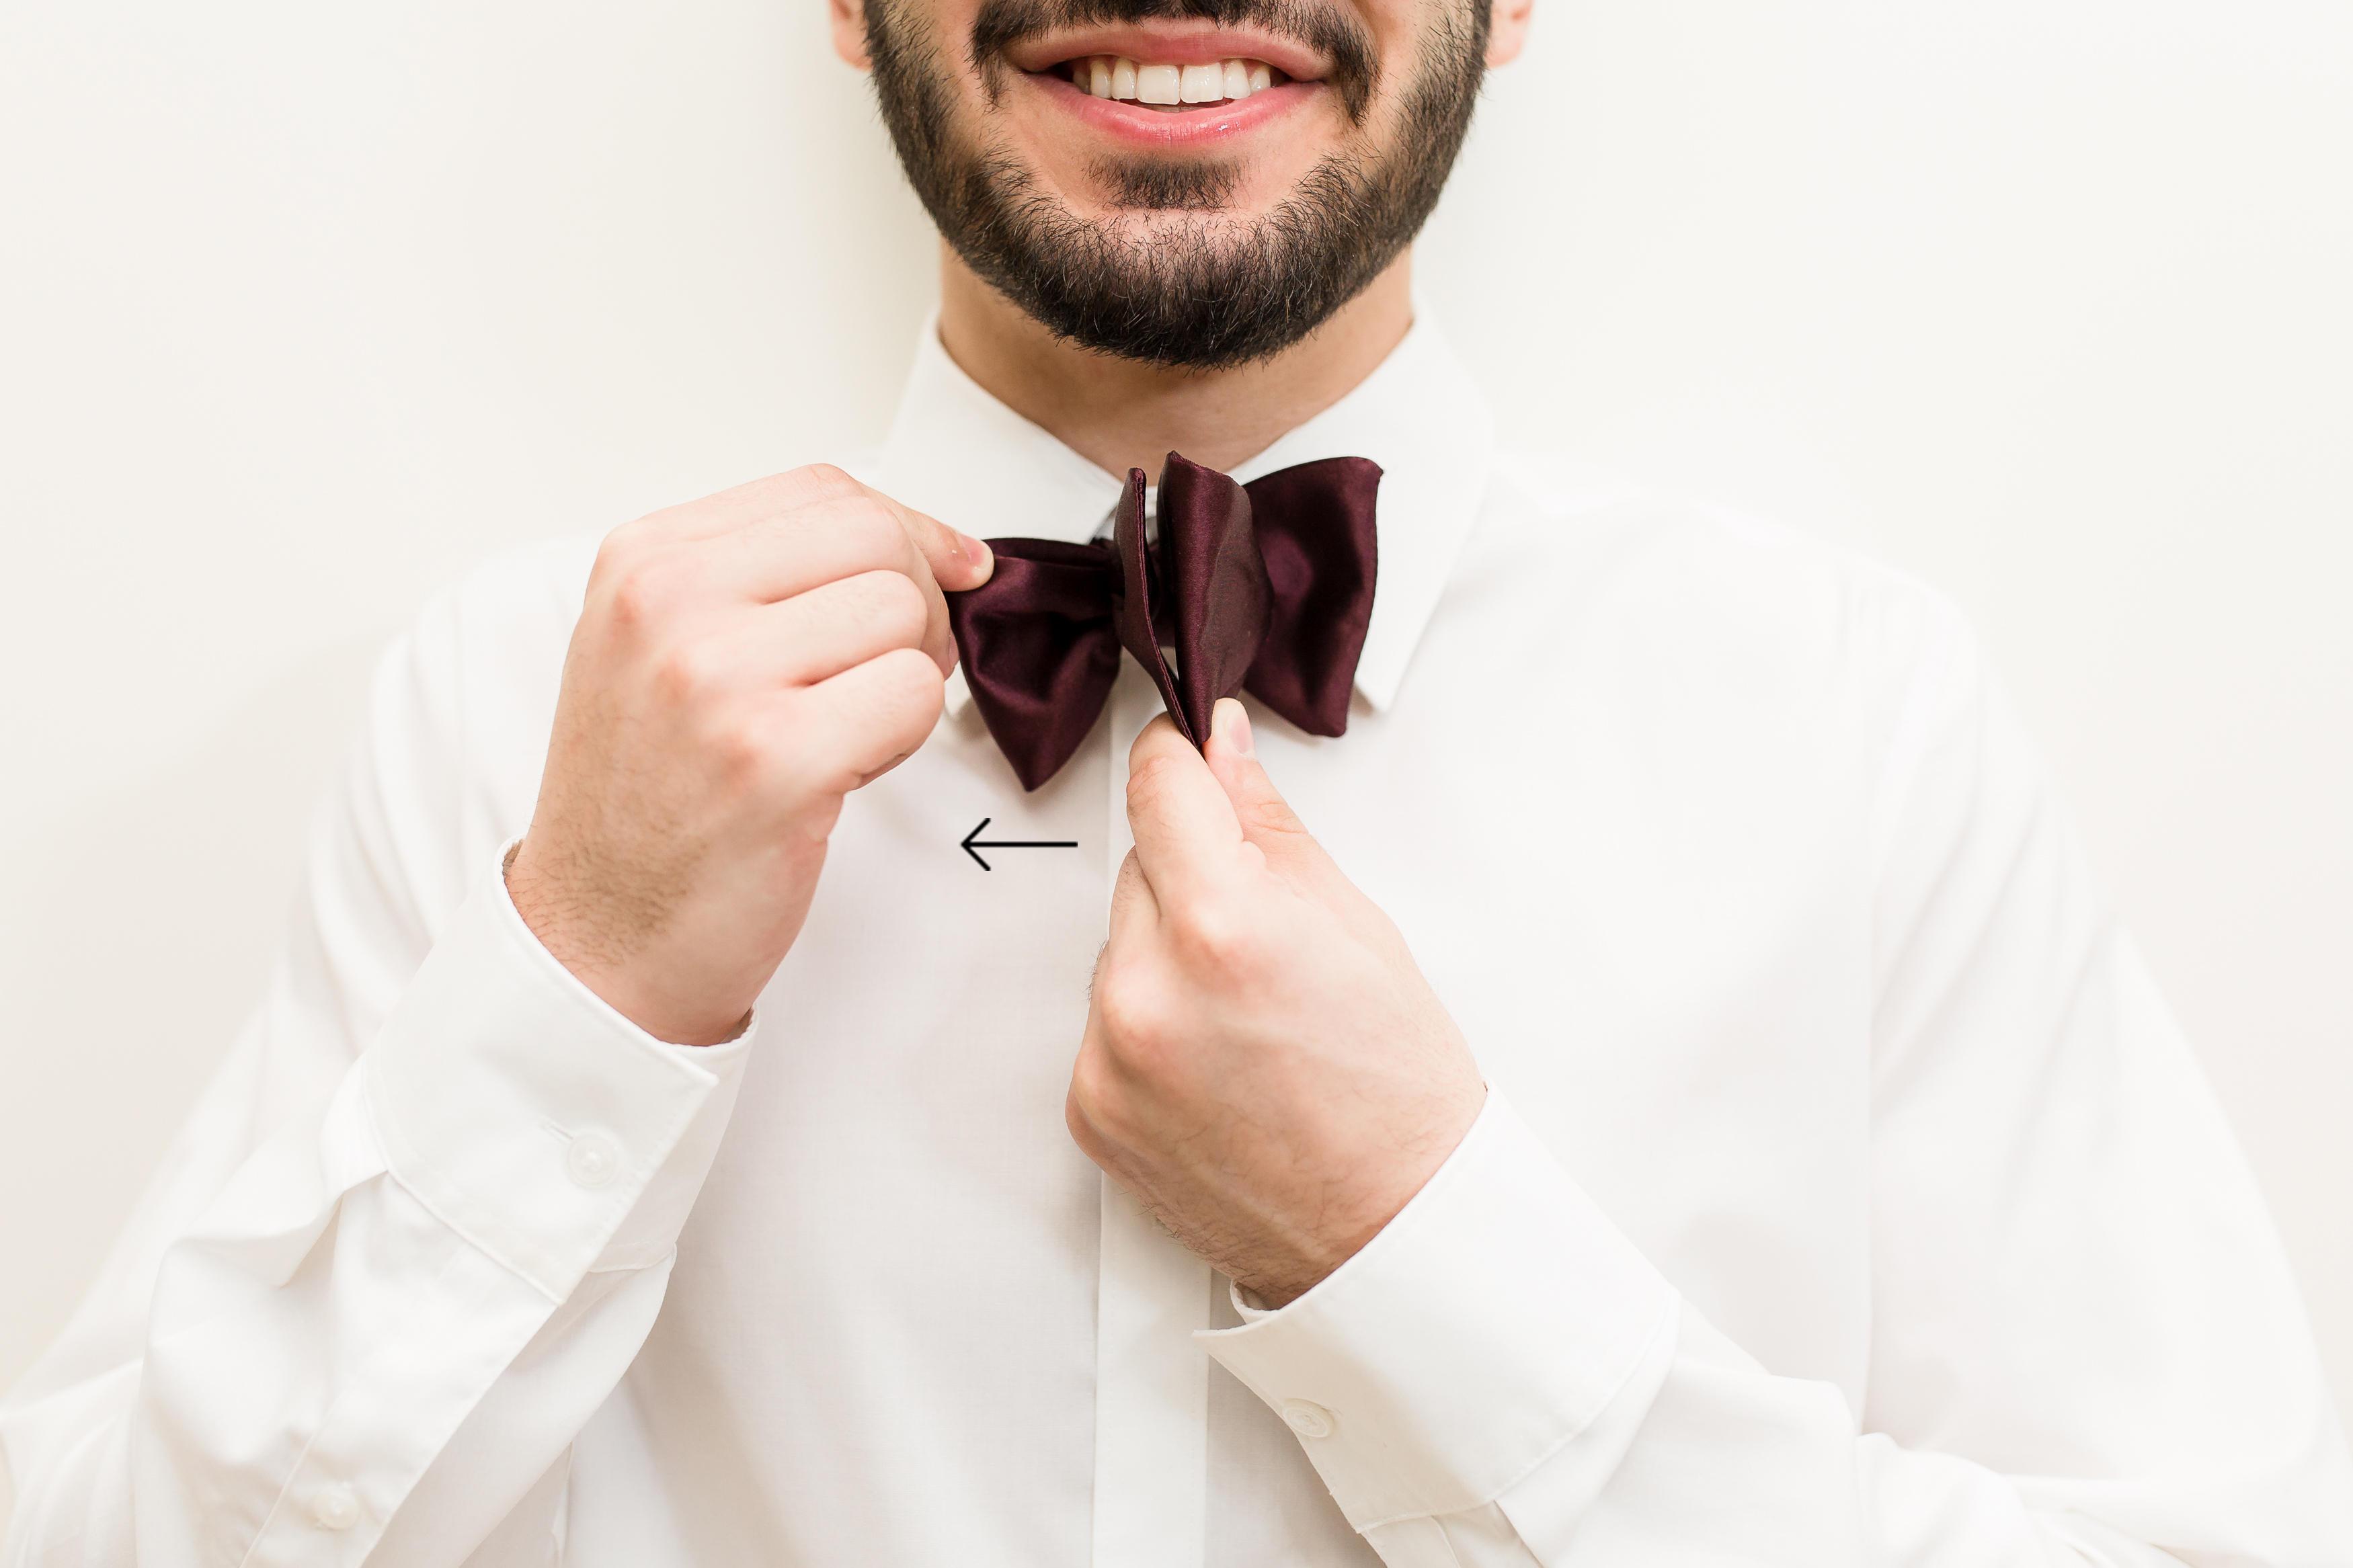
8) Push the pinched end (the base of B’s shape) through the loop behind A (shown in step 6). The very end of B will remain on the left side while you fold/push that pinched end through the loop creating the final bow shape.
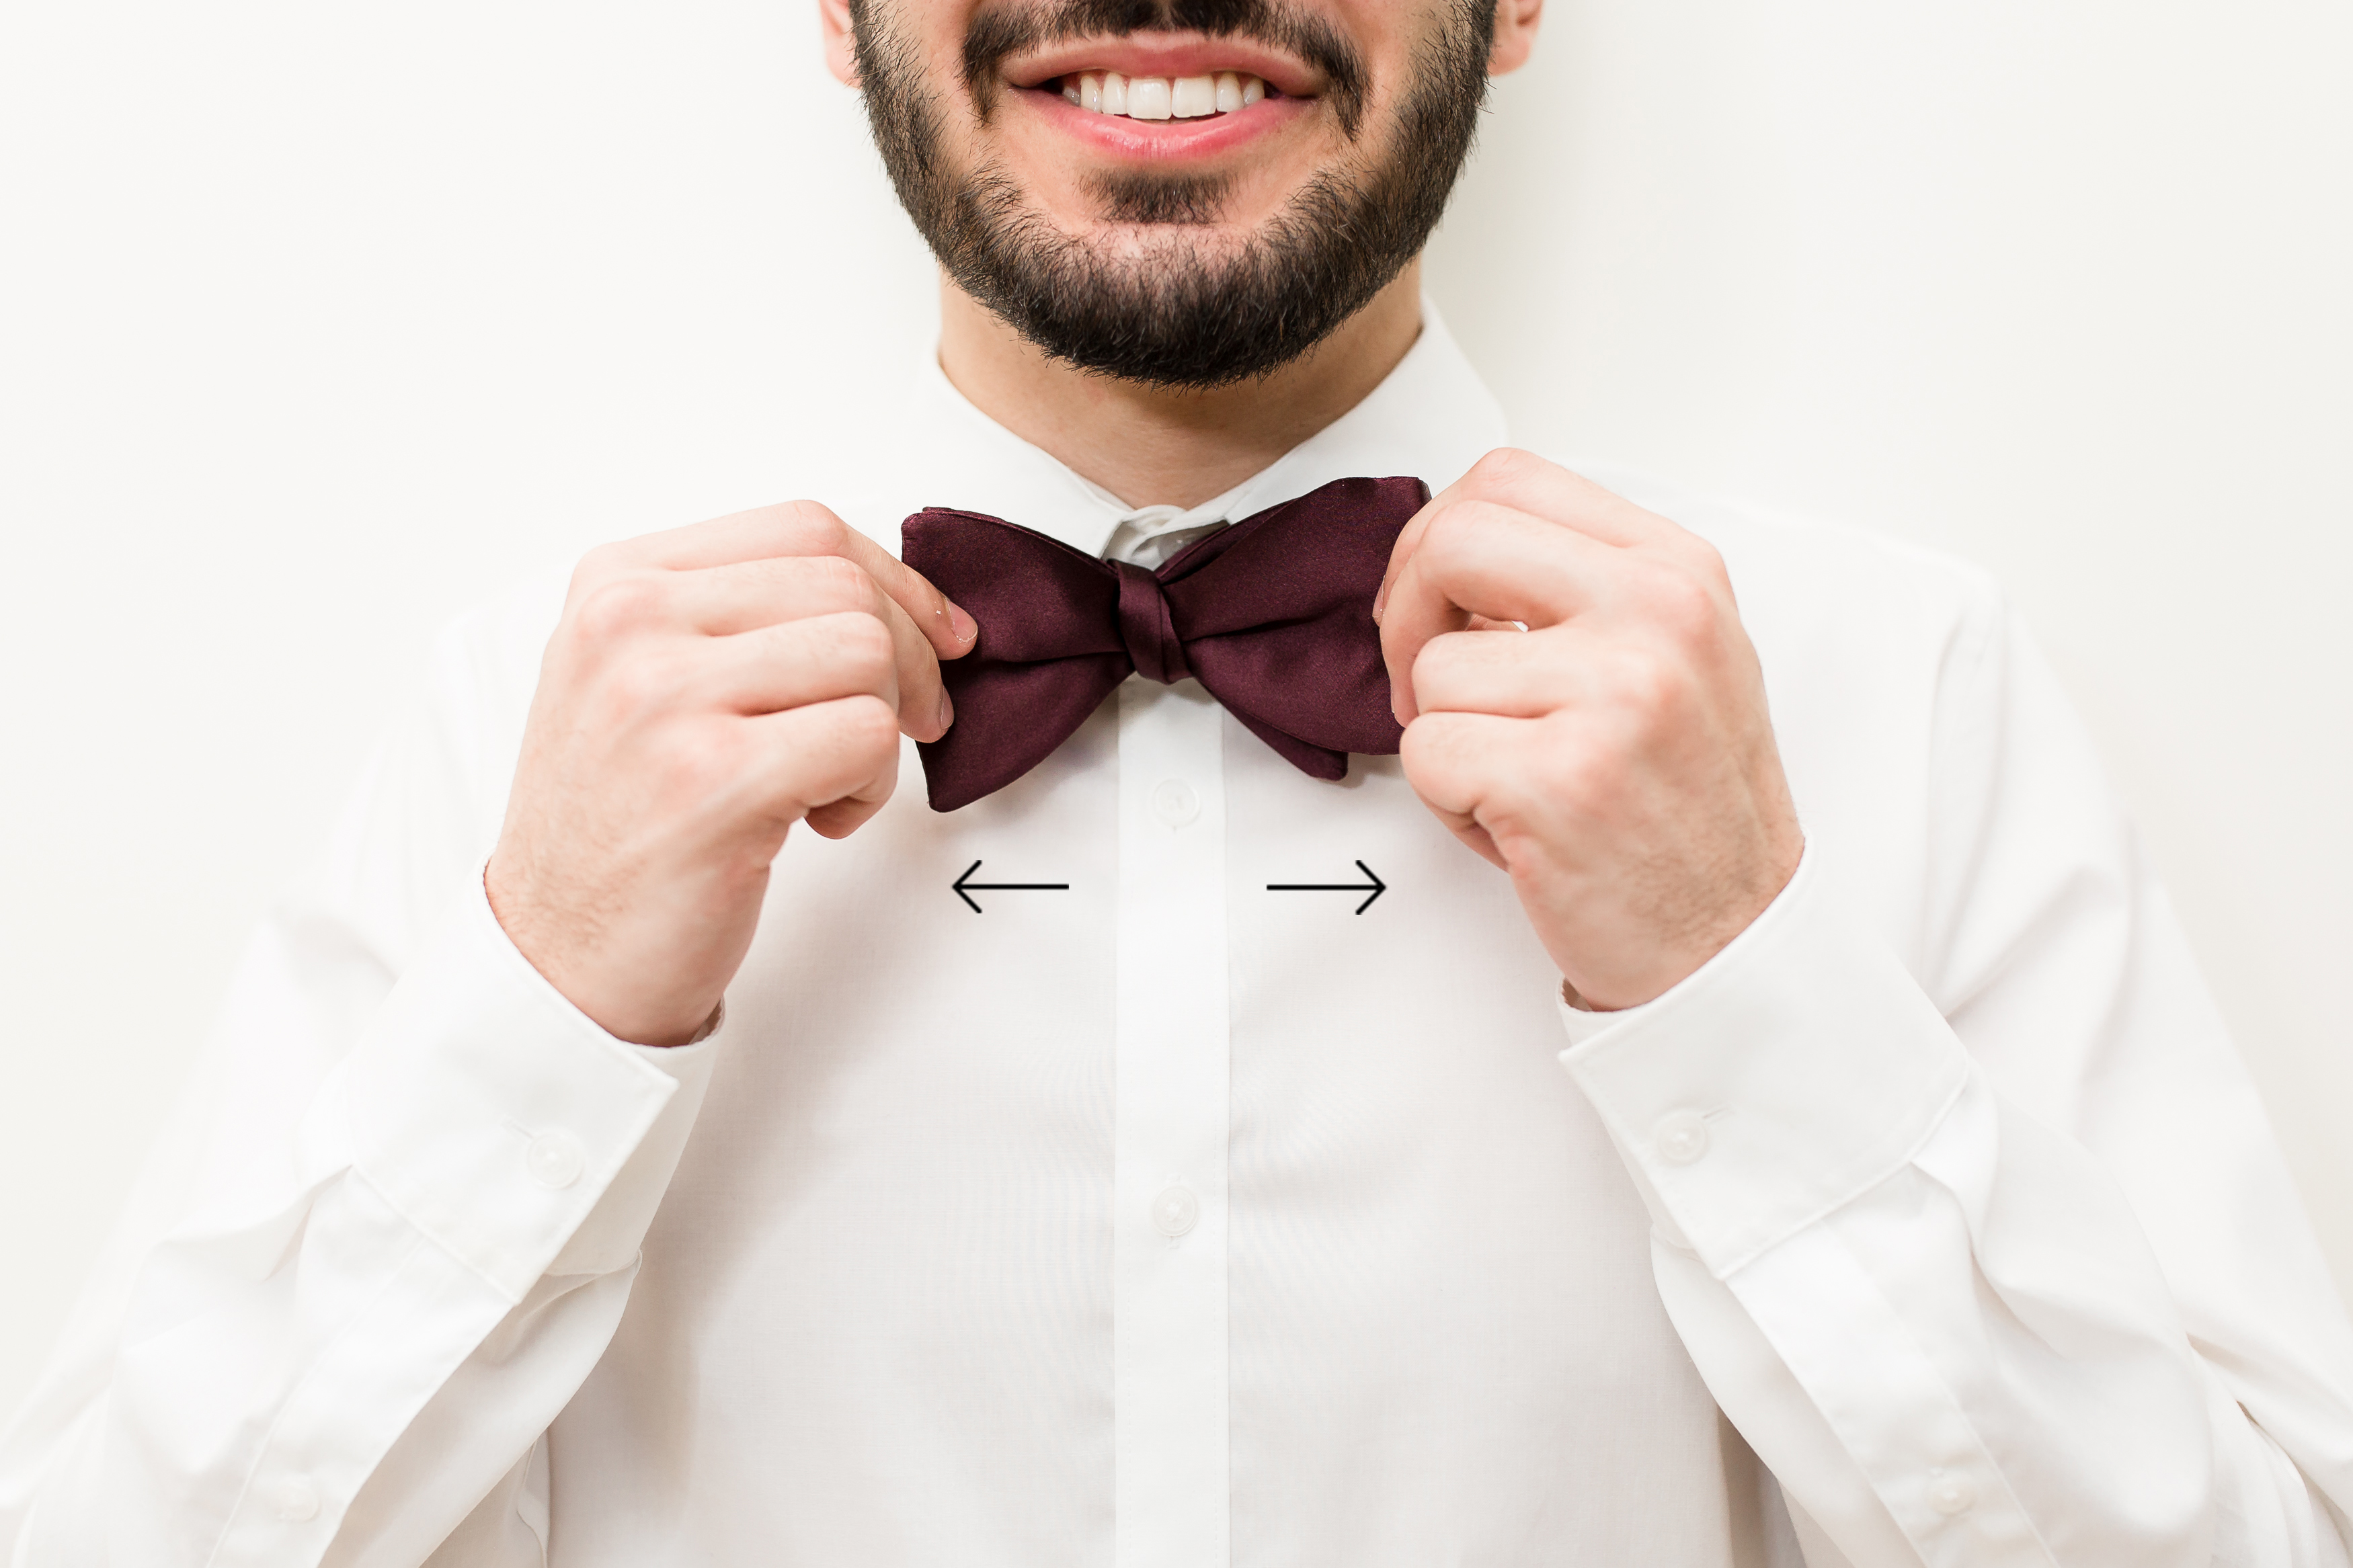
9) Pull on the folded parts of the bow to tighten.

10) Adjust until even on both sides. (Adjust by pulling the normal ends, then re-tighten by pulling the folded ends.)
And that’s it! With a bit of practice you’ll be busting through these knots with ease. I hope this was helpful and wish you all the best come your big day!

Paragraph

I love it! With photos?!? So helpful! Bookmarking.
Beautiful bow tie tutorial!
YAY! The bow tie! I’ve been waiting for you to do this tutorial! I have always wanted to know how to tie a bow tie
Men in bow ties always look so dashing. Love this series.
I love bowties! I think I should really learn how to tie them one of these days!
I love this series!! So awesome!!
That’s awesome thanks so much for sharing. I’ll have to bookmark it cause guys are always asking me how to tie a bowtie and I have no clue!
This tutorial is another great one! My hubby wears bowties for church, and he’s tried to show me how to tie them, but this is WAY easier! :)
Wow, I did not know that men accessories can be so selective. I will take care of the latest fashion. This blog has really helped to know about latest men fashion. Thanks a lot!
Excellent ever